Cannabis
Space Bucket – A DIY At-Home Grow Kit

Feb
Growing your weed can be challenging, especially if you don’t have the resources, including time and budget, to do so, but there are plausible solutions, such as a Space Bucket.
It takes a lot of green to grow green professionally. So, what if you don’t have the cash flow or square footage to do it to such a degree?
Fortunately for us budget growers out there, you can create a sustainable growing method for your weed using a Space Bucket.
If you’re interested in learning more about DIY weed growing and how to grow cannabis on a budget, keep on reading!
What is a Space Bucket?

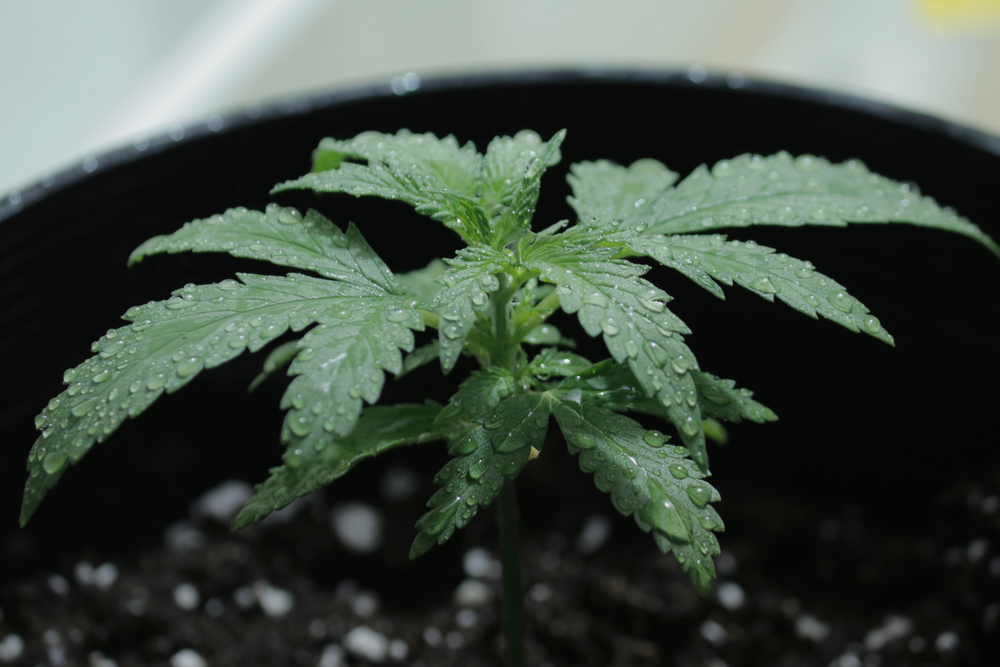
A Space Bucket is a pot that can accommodate growing a single cannabis plant. They are typically DIY projects, made out of 3 or 4 5-gallon plastic buckets, a light source, some fans, and a power strip.
Essentially, a Space Bucket provides all of the critical elements of a successful full-sized grow room while scaling it down to suit a single plant’s needs.
One of the primary reasons using a Space Bucket for growing weed has been so successful for small growers is because it doesn’t require a lot of space.
A Space Bucket isn’t all that large, and it’s certainly taller than it is wide, making it an ideal option for growing cannabis in smaller spaces like apartments, dorms, or even closets.
In fact, many people are starting to get some experience with growing their own weed at home by using Space Buckets.
They’re cheap, efficient, and can be created and used on your own.
How Does a Space Bucket Work?
As we outlined above, a Space Bucket operates as a self-contained environment for your cannabis plant. The 5-gallon plastic buckets that make up its body will act as a membrane for the weed.
Within the buckets, there is enough room to fit at least a couple of fans for intake and exhaust, as well as an LED, grow light, a power supply, and possibly a couple more small gadgets.
Of course, you could also increase the actual height of the Space Bucket by using more plastic buckets, which will give your cannabis plant more room to grow taller.
When growers start their cultivation, they will most likely use a clone to get things started. It’s a safe and easy way to know what you’re going to get.
The plant will be placed in a Space Bucket early in its life cycle, where the inside of the bucket walls will be lined with reflective material so that the light source on the lid can provide energy to the plant.
The fans installed will provide the plant with an adequate supply of oxygen by cycling in and out of the Space Bucket.
Finally, to top it off, a Space Bucket usually has holes drilled into its base for drainage.
The cannabis plant will be able to thrive in this environment for months with some regular maintenance and pruning.
Some growers have even gone the extra mile and upgraded their Space Bucket to have their smartphone track the internal temperature and humidity, giving them accurate real-time responses.
In this way, a Space Bucket can be as elaborate or as basic as your budget allows.
How to Make a Space Bucket
Don’t worry. You don’t have to be Tim “The Tool Man” Taylor from classic 90’s sitcom Home Improvement to get this job done.
In fact, you don’t even have to be remotely handy to make a Space Bucket. It’s actually quite easy and fun to do.
However, to make a Space Bucket, you are going to need a few tools and materials.
So, here’s what you’re going to need to make a Space Bucket:
Equipment
- Two 5 Gallon black plastic buckets (Add or decrease the number of buckets to increase or decrease the Space Bucket’s height)
- One 5 Gallon plastic bucket lid
- 180W Full-spectrum LED grow light
- Two 12V 80mm computer fans
- 1 Power strip
- 4 Bolts
- 4 Nuts
- 4 Washers
- 1m of thin rope
- Spray glue or any other adhesive
- Tube of silicone sealant
- Marker
- Measuring tape
- Duct tape
- Reflective mylar
- Rotary tool
- Drill
- Razorblade
- Screwdriver
- Safety goggles/glasses
Step 1: Create a Tray for Catching Drainage
Use your measuring tape and marker to measure 8 cm upwards from the bottom of a bucket.
Mark it with your marker as a horizontal line and prepare to cut the bottom of the bucket off at that mark with your rotary tool.
Grab your safety goggles or glasses and begin removing the bottom at your marking. Set the tray aside, as it will be used to catch drip and drainage.
Step 2: Drill Some Drainage Holes
Grab your other 5-gallon bucket and remove the handle that is attached to it.
Begin using your power drill to make holes in the bottom of the bucket. You’ll want to drill roughly 10-12 evenly spaced apart holes so that the plant’s drainage will have space to runoff.
This bucket will serve as the bottom portion of the Space Bucket. It will be placed on top of the drainage tray you made.
Step 3: Attaching the Buckets
On the lower section of your Space Bucket, drill 4 evenly spaced holes around the circumference of the bucket.
Ensure that they are about 4cm from the top of the bucket and are level with one another. Once the holes are drilled, insert a bolt into each hole and secure it with a washer and a nut.
This will create a sort of ledge that the upper portion of the Space Bucket will rest on to give the plant room to grow taller.
Now, place your top portion of the Space Bucket on the bottom section. Be sure to mark where each of the bolts touches the bottom of the top section of the Space Bucket.
Draw a line 4 cm upwards from where each bolt meets the bottom of the bucket’s top section. At the top of each line, mark it 4 cm to the left, making an upside down L.
At this point, you’ll want to cut into the markings with your rotary tool as the bolts are meant to slide into the slot and twist to lock.
Step 4: Create Slots for the Fans
On the bottom section of your Space Bucket, measure an 80mm slot 8cm from the top rim.
Make the necessary cutouts and ensure that the fans are able to fit into each slot.
Step 5: Installing the LED
Now, the next step is to attach the LED light to the lid of the bucket.
Use a paper to trace the position of the mounting holes on the light and transfer the position of the mounting holes to the center of the lid so that they may be drilled.
Put on your safety glasses and drill the holes according to your measurements. Secure the light to the lid.
Step 5: Line the Bucket and Attach the Fans
With everything installed, it’s time to line the interior walls of your Space Bucket with mylar film.
This lining will create a reflective coating so that all of the light can be directed towards the plant.
Now, install the fans. One fan should be used for exhaust and the other for intake.
Secure the fans to the bucket and use the silicone sealant to close any gaps.
Step 6: Test It
If everything was installed correctly, plug the LED and fans into the powerstrip and test your bucket.
If everything is green and working, you’re ready to grow!
Alternatives to a Space Bucket
While creating a Space Bucket is an ideal method for users looking to experiment with growing their own bud, there is such a thing as user error.
If you’re looking for top-quality dank weed, this may not be the way to go. As well, if you aren’t looking to upgrade your home decor in the form of plastic buckets, there are other alternatives.
Not everyone is interested in growing weed for themselves, and that is entirely fair! You never know what might go wrong or whether or not your homegrown weed will even be smokeable.
Some things are better left to the professionals who have the allotted time, money and resources to produce high-quality green. Not only that, but gone are the days when you had to walk into a dispensary to pick up your goods.
Online retailers, such as Buy Low Green, take all the guesswork out of buying bud with the added convenience of users being able to select and buy weed online and have it delivered straight to your door.
All you need to do is reap the benefits!
Space Bucket – The Perfect Tool for a Novice Grower
With so many people now working from and spending more time at home, there has never been a better time to try and experiment with growing your own weed.
What’s more, you don’t even have to make a large initial investment for a full sized grow room. You can start small with a Space Bucket.
These small self-contained environments are an elegant solution for growing weed in small spaces, whether you’re a small-time grower or an experienced cultivator.
However, if you aren’t eager to put in the leg word and grow your own bud, that’s okay, too!
There are plenty of options for you to buy weed online so that all there is to do is sit back and reap the healing and recreational benefits of your favourite plant.
Check out the Buy Low Green website to see all the variations of flower we have available!
Happy toking!